Editing docs in Gitlab
The easiest way to edit pages in a docs site is to use the Gitlab Web IDE.
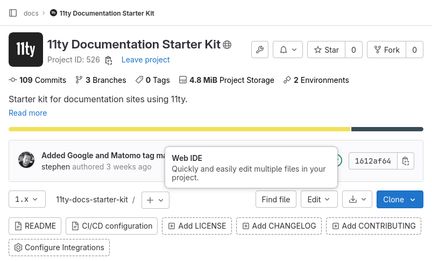
Using the editor
To open the editor, navigate to the project you wish to edit in Gitlab, click the edit button on the right and select Web IDE.
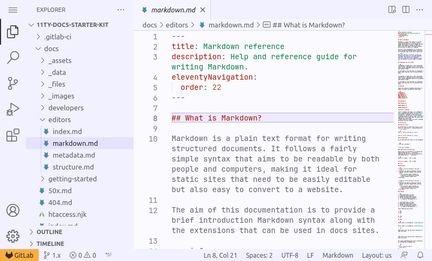
Once open, you can navigate around the docs files in the explorer on the left. Open the files you wish to edit and make the changes.
Once you've made all the changes you want, click the Source Control icon on the left. You will be taken to a page where you can review the changes you've made.
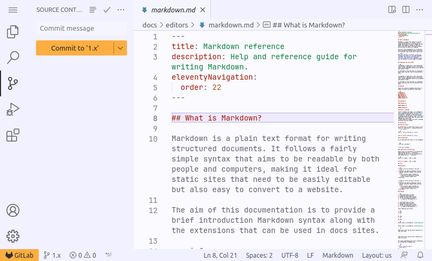
If the changes you've made are very minor (fixing typos for example) then you can commit the changes to the default branch, but best practice is to create a new branch and commit the changes to that. You can them make a merge request and ask someone else to review the changes before they're merged and go live.
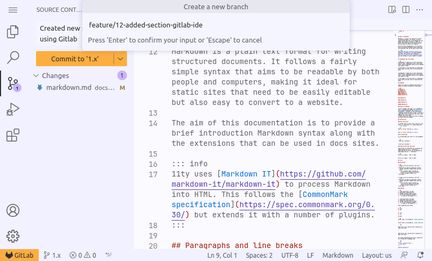
To commit the changes to a new branch, in the source control section, add a message describing your changes where it says 'Commit message'. Then where it says 'Commit to', click the dropdown and select 'Commit to new branch'. This will open the create a new branch dialogue. Enter a branch name and press enter to create the new branch. If the changes you're making correspond to a ticket in Gitlab include the ticket number in the branch name. For example 'feature/1-added-using-gitlab-doc`.
You should see a success message. You can now create a merge request by clicking the 'Create MR' button in the success popup.
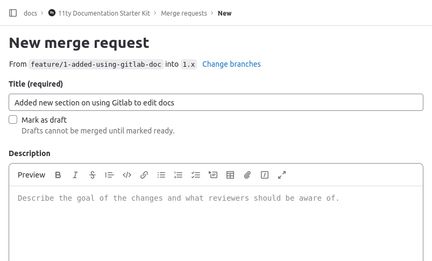
Creating a merge request
If you've clicked the 'Create MR' button after using the editor, a new window will open allowing you to create a new merge request. Alternatively you can use the menu on the left and got to Code > Merge requests, click 'New merge request', the source branch is the branch with your changea and the target branch is the default branch; which should already be selected.
Add a title that describes the changes you're making and a description if that will help people understand the changes. Select someone to review the merge request. Then click 'Create merge request'.
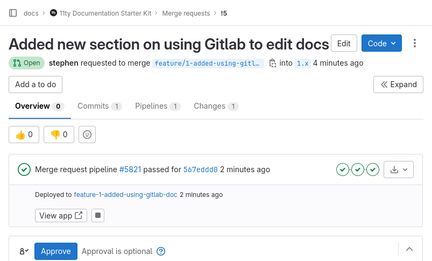
Gitlab will deploy the changes you've made to a test site with a unique URL. You can use this to check that the changes look okay and helps the reviewer confirm they're happy with the changes. This takes a while so be patient.
Once the testing environment is ready you'll be able to open this by clicking the 'View app' button on the merge request. This will open a new window to the test site with your changes.
Making changes to an existing branch
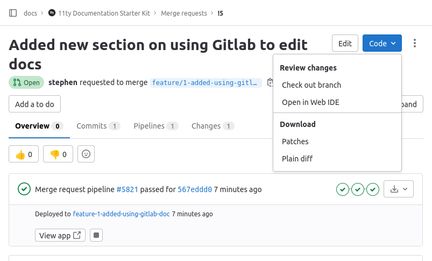
If you decide you need to make further changes before it's ready to review, you can open the Gitlab editor again on the branch you created by clicking the 'Code' button on the merge request and selecting 'Open in Web IDE'.
You'll then be able to make additional changes. Once you're done, commit the changes as you did before, but rather than creating a new branch, commit the changes to the branch you create for the merge request.
Once any further changes have been committed, they will be deployed to the test site. It will be a little while before they're visible.
Merging a merge request
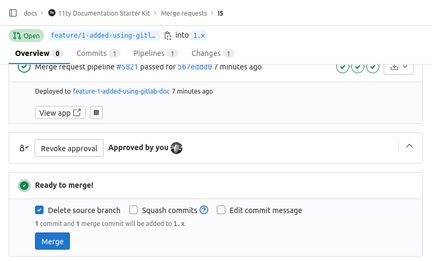
Once the changes have been reviewed and approved by a reviewer you can merge the merge request. This will incorporate your changes in to the main branch and deploy them to the live site.
On the merge request page, simply click the 'Merge' button. This will merge the changes you've made and delete the branch you created earlier.
After a little wait your changes should appear on the live site.
Last updated: